Showing posts with label Carpentry. Show all posts

Sunday, November 29, 2009

Sunday Stills: The Letter T


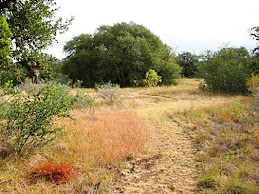
Finally, our colors here are Turning. Fall comes very late when you live so close to Mexico. I've been thinking of it as Summer, since our Summer was Hell. This is the part of my house that used to be the Town Post Office until 1968.


I was inspired by dibear and the shot of her cactus earlier this week, so when mine opened I took one too. I know it's supposed to be a Christmas Cactus, but I think of it as a Thanksgiving Cactus as that's when it always seems to bloom.


Here's my Thoughtful Husband, Farmer Rick, icing a birthday cake he baked for me. Everyone tells me 50 is the new Thirty. This is because they are all older than me and it makes them feel better, too.


I was able to capture Starley, my camera-shy Terrier, giving me a kiss.


I got this nifty set of Tools. One of the advantages of aging is the gifts get better. Remember how thrilled you were at 14 to get just a dime store curling iron? Jewelers use dapping blocks and punches to form metal into curved shapes. This set ranges from itty-bitty to door knob size. Wow! If you've been following the progress of our chicken coop, then you'll know how much I like curves.


I also love the curves of my new Toaster!


Some friends sent me this  Ten Good Things About Getting Older card. I particularly like #5 You can take bets on which part of your body will conk out next. Remember the rib I dislocated earlier in the spring when we began the new chicken coop? Well, I did it again, on my birthday, no less! (By the way, my chiropractor goes by the name Dr. T. I will be calling him Tomorrow!)

How did this happen? Tearing apart our bathroom. Seriously, the space has been bothering me for a long time. Everything came out except the Tub and Toilet (this will eventually be traded out for a low flush model, since our water is like gold to us now). You may remember what I started with when I got this idea back in the summer. Ultimately I decided the only thing I really liked about the room was the switch plates! Well, you have to begin somewhere.


So, I began at the most logical place...by purchasing Toast, Tan, and Tangerine Towels to match...


...and collecting Tile for the mosaic mirror surround I plan to make.


But renovation isn't all fun and towels...it is going to be a Terrible Trial of our carpentry skills.  Remember that big mirror?...well apparently it was covering some hidden Trouble!

OMG: WWBVD? (What Would Bob Vila Do?) For more takes on the letter T, visit Sunday Stills.

Friday, August 28, 2009

Back to the Basics

Since the wet wipes method of body hygiene really wasn't cutting it, I detoured Farmer Rick off of coop building this week to construct an outdoor shower. I've seen them in magazines like House Beautiful set in lush gardens and thought it would be nice to have one. But then, that's different than actually needing one!

You can see the dirt where our lawn has bit the dust. The view to the fence is the same from the open side of the shower. Fortunately it's wooded, and we also own the land on the other side of the fence. The shower base is made from a wooden pallet set into a gravel box. A foundation block was placed in each corner to hold the structure.

Except for the plumbing hardware, the shower was almost entirely built with recycled materials. It's enclosed on three sides by heavy canvas curtains that came with the house. They were so heavy they were pulling the circular shower rod down that I replaced them with lighter ones and stored them for 9 years. See...I just knew they'd come in handy someday! (In the background, that's the gazebo that came with the house that we turned into a greenhouse last year).

Here's a curtain rod detail...

a corner detail...

and the plumbing hardware detail.

Here's what it looks like on the inside. I see some dirt has already been tracked inside, but guess what? I don't care, ha ha!

And finally, the neighbor's garden hose that's keeping us watered. I'd like to get a little shelf inside for the shampoo and soap, and will look for some neat driftwood down in the creek for towel hooks. Maybe we can talk landscaping--after a rainy year or a new well, whichever comes first.

Sunday, April 26, 2009

Coop Wall Framing Begun

Farmer Rick has begun the first wall of the new chicken coop. This wall will eventually mostly be inside the coop, but since we are building it in stages it must serve as an exterior wall for a while. Here you can see the door frame.

The wall is being built from recycled lumber we've gotten from several folks. Even the window is recycled.

We are setting the fixed glass window low enough for winter light to shine in on the chickens and for them to be able to see out from their dust bath. Here FR is measuring the sill to see how to position the glass and the wooden stops that will hold it in place.

The window is being lowered into the inside frame stop.

Here the outside frame has been applied to hold it in place.

Here's the nearly completed framing of the first wall. Notice how we used the floor as a flat surface on which to build it. The outside panel with the window will be sheathed in plywood, and the rest hardware cloth. For now, it has been moved to the side on top of the other floor joists to make room for the next wall to be built.

Tuesday, April 21, 2009

Installing the Coop Flooring

Here Farmer Rick is installing the sheet vinyl flooring.

It's going down with a flooring glue and a trowel with grooves. The grooves are important to help the glue spread once the vinyl flooring is pressed down onto the plywood subflooring.

After drying 24 hours, the trimming begins.


Ta da! Now it just needs mopping to get the tree pollen off. Of course with the lovely speckled pattern you'd never know it was there if I didn't tell you.

FR pointed out the shape kind of looks like a grand piano. FR is an amazing pianist--no wonder he liked working on it! Next up will be the walls...stay tuned!

Sunday, April 12, 2009

Cutting the Curves

First, we transposed the curve from the bottom to the top. This was accomplished by drawing a series of parallel lines on both the top and bottom of the plywood, measuring from the bottom and marking it on the top. I added a half inch just to make sure the saw didn't hit the metal panels.

Since I couldn't find my artist charcoal or chalk, I opted for a barbecue brickette and a curving yardstick that warped in the rain.

It was a matter of connecting the dots. Farmer Rick wanted me to make the cut, seeing as how the curve was my idea in the first place. It's important that chickens have good feng shui, you know.

This is my Dewalt reciprocating saw. It is often generically called a Sawzall, even though that's another brand (Milwaukee). I got it to demolish parts of my former flooded home. When I bought it a decade ago the salesman thought I should buy a smaller, more ladylike one. Even though this one is the biggest and heaviest, it is counter-weighted to balance it for a smoother cut.


Tools are a great investment. If I had to choose just one saw, it would be this one. You can buy blades to cut through whatever you want.

Here's the finished cut.

We had a little rain last night (imagine that!) so here we've tucked our floor under the sheet vinyl that will eventually cover it. That was after we did a little dance together on it, and got to thinking how the roof could incorporate a little deck into the oak, maybe with a staircase following that curve...

Here's a closeup of the vinyl. I think it's supposed to look like regal gold flecks, but it just looks like the chickens have already been there. Next task, building the walls.

Saturday, April 11, 2009

Critter-Proofing the Coop Part Two

Once the panel was attached, chicken wire was added as the second layer of critter-proofing the underside of the coop. It was stapled to the back side of the joists, tied with brick ties to the front of the panel, and bent into an "L" below the ground and covered back over with the soil.


Finally, the flooring goes down! This is 3/4" plywood.

Here Farmer Rick is demonstrating "Measure Once, Cut Twice". He says he's working his way up to Carpenter Rick. There is less digging in carpentry.

If you ever keep chickens you will soon be looking for ways to make chores easier and your coop cleaner. We recommend using vinyl flooring. We hope to get to that tomorrow.

Sunday, April 5, 2009

Critter-Proofing the Coop Part One

Today Farmer Rick began trenching around the part of the coop that we will finish first (in order to soon get the ever-growing chicks out of our bathtub).

There sure is a lot of digging in homesteading! --Farmer Rick


We are using 4" x 4" welded wire panels and cutting them to fit. They come in 20 foot long sections, but we cut them down to 5 foot sections to fit in our vehicle. Some people around here call this hog panel, however at the farm store where we purchased it they told us you only call the 6" x 6" hog panel, and this stuff "just panel". It's secured to the rim joist with fence staples. Bailing wire ties are securing them together at the joins, using a brick tie tool. In part two we will use the ties to attach chicken wire over this.

Looks good when it turns the corner.

Because we are building the coop as we have time and money, we must secure underneath and across the foundation for the part we will finish and use first.
Blog Widget by LinkWithin